Tell ChatHome.ai what home means to you
A useful brief explains the space you have and the life you want to make room for. Start with the essentials, then add the preferences that matter most.
1. Describe the plot
Size and entrance
Give both plot dimensions and name the entrance side. For example: “A 16 by 24 metre plot, with the entrance on the 16 metre south side.” Use the same unit throughout the brief. Learn how to describe your plot and entrance.
Site conditions
Mention shared-wall boundaries and a sloping site if they apply. For a slope, describe the high side and the total fall across the plot. This helps the generator interpret the house in relation to its surroundings.
Name the location when it matters
A country or city helps the quantities report choose its regional material practice, and sets the storey-height preset a generated plan uses when the brief states no ceiling or storey height. You can also choose the practice yourself when exporting. Learn how the quantities report uses location.
2. List the rooms and floors
Start with bedrooms, bathrooms, a living room, and a kitchen. Add a study, dining room, laundry, or storage if you need them.
Say where a room belongs
If your home has several floors, group rooms by floor. A clear instruction such as “all three bedrooms upstairs” is easier to review than a general request for privacy.
3. Separate exact sizes from preferences
When dimensions are essential
State both width and depth as inside measurements, such as “a kitchen measuring 4 by 4 metres.” Always write the unit in your brief or revision, even when the screen is set to feet: a bare “15 by 20” leaves it unclear. Keep exact sizes for the rooms that need them and check the delivered dimensions and notes. Understand room sizes and measurements.
When you have a target in mind
You can ask for an approximate floor area instead. The delivered area may change as rooms are arranged. Read the result notes and ask about the generated sizes.
4. Add a few design preferences
Choose a supported roof style, wall colors, and floor finishes. If you say nothing about the roof, the plan gets the region's default: flat in Pakistan, India and the Gulf, gable elsewhere — by the country your brief names, then the region on your account, then American. Add an outdoor feature or a kitchen counter arrangement if it is important to you.
Leave room to explore
Begin with a short list of priorities. Furniture positions and outdoor wishes depend on the available space. Add more details after you have looked around the first concept.
A complete brief to adapt
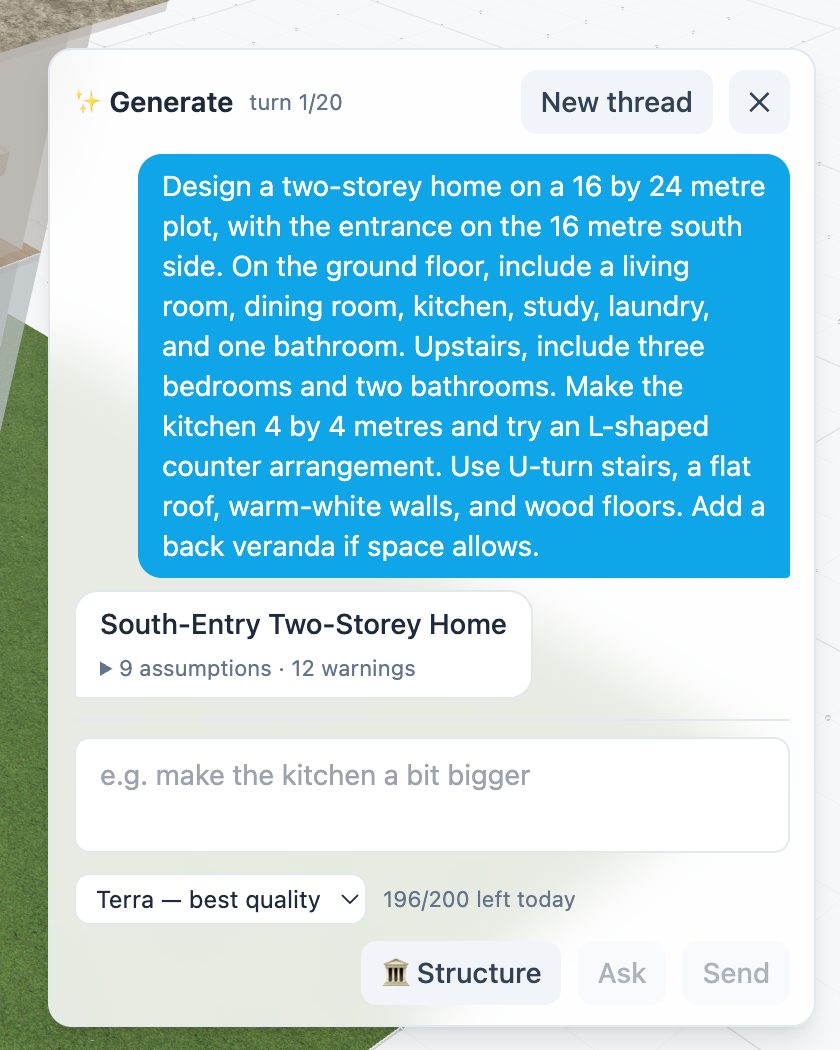
“Design a two-storey home on a 16 by 24 metre plot, with the entrance on the 16 metre south side. On the ground floor, include a living room, dining room, kitchen, study, laundry, and one bathroom. Upstairs, include three bedrooms and two bathrooms. Make the kitchen 4 by 4 metres and try an L-shaped counter arrangement. Use U-turn stairs, a flat roof, warm-white walls, and wood floors. Add a back veranda if space allows.”
This example is a request to adapt, not a tested or guaranteed layout.
Check that your wishes work together
Match the roof to the outdoor space
A rooftop terrace requires a flat roof. A courtyard also requires a flat roof and cancels a rooftop terrace. Choose which idea matters most before putting both into the brief. Work through a brief that needs adjusting.
Keep requests within the tool's scope
Keep room relationships, material preferences, and technical requirements clear in your brief. Explore the design options as you decide which details to develop first.
Read the result before adding more
Look at the assumptions and warnings, inspect the plan, and ask about anything unclear. Then try one focused change at a time.